Privacy is a major concern of every user whether he/she is using facebook account or any other account. Millions of people using facebook to connect with their friends, family and loved ones. We upload and share baby pictures, funny web sites and our latest adventures. We talk about everything there. Password breach is big problem than you may think.
If you want to keep your facebook account safe then you must follow some simple steps. Facebook will help you to keep your account safe because the feature has already been provided.
I will show you how to configure your facebook account and privacy settings in just few simple steps.
Step-1:
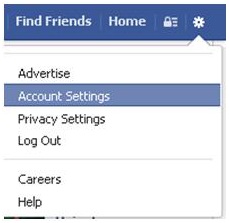
Login to your Facebook account and simply click on the “Account” drop down menu in the top right corner of the web site. Then click on “Account Settings”.
Step-2:
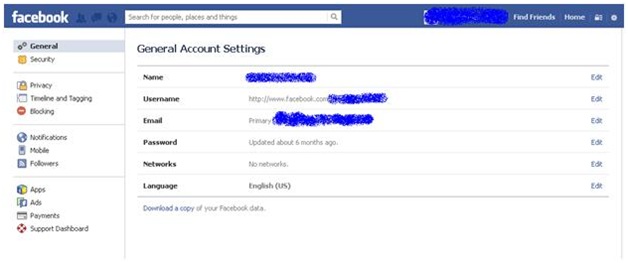
As you will click on “Account Settings” following screen will appear. By default “General Account Settings” option will show.
I would like to recommend you to use dedicated email address for Facebook account. Don’t use same e-mail address for the use of banking or other sensitive information.
Create a strong and secure password. Choose different password for your facebook account rather than using the same password as banking password.
Step-3:
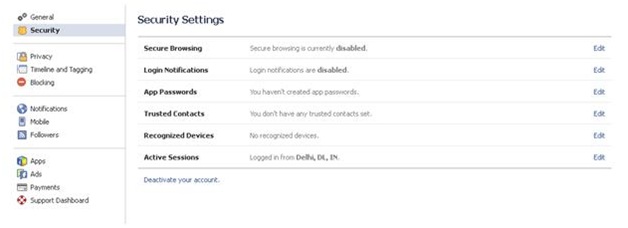
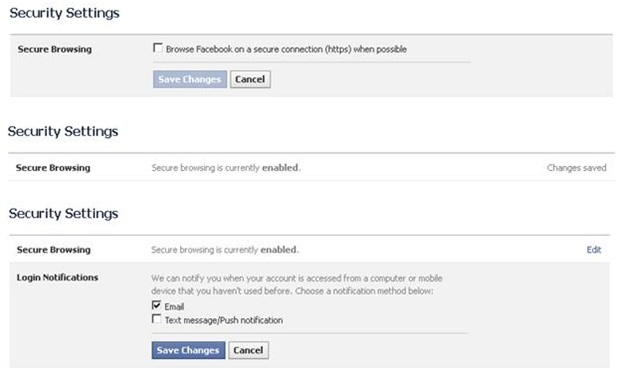
Now click on Security Settings, following screen will appear.
First enable Secure Browsing to protect it. As you click on edit button following screen will appear to enable Secure Browsing.
Just select and save settings to make changes permanent.
Now enable Login Notifications – this lets you know when your account has been accessed. Select Email and save changes and get notifications via email.
Step-4:
Click on ‘Privacy’ tab located in the left column to make changes:
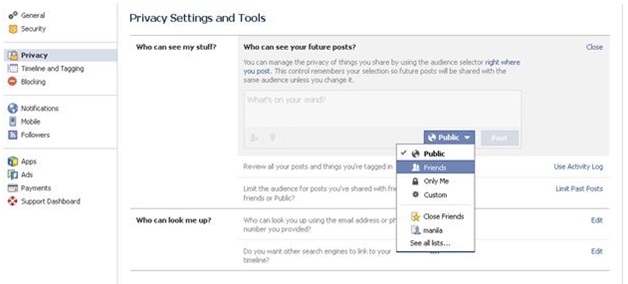
Set its default privacy to Friends rather than using it as Public.
Use the Activity Log to review all your posts and things you’re tagged in so that you can verify the details.
You can limit the audience for old posts on your Timeline
Step-5:
Click on Timeline and Tagging tab to change the settings, it is recommend using following options for security purposes.
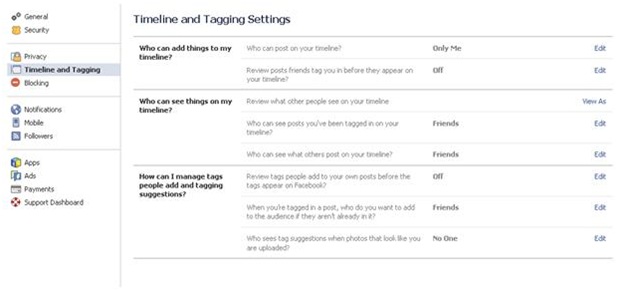
Who can post on your timeline is set to “only me” because sometimes it is seen some people post something embarrassing which you don’t want as your family members are connected with you. So choose this option to avoid such type of situation.
Step-6:
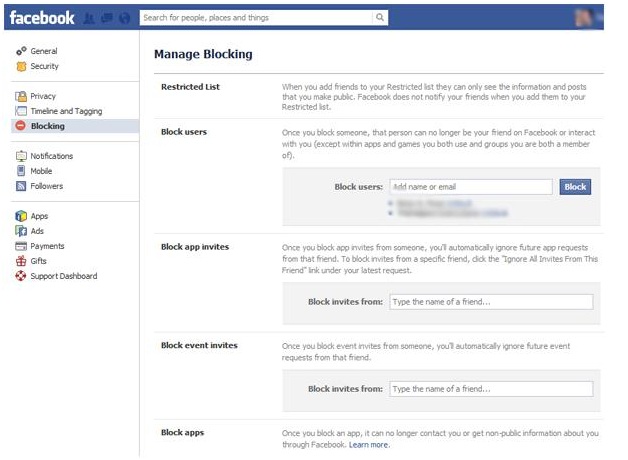
Click on ‘Blocking’ tab, here you can manage this option by yourself like managing all the people, applications and events that you have blocked on Facebook.
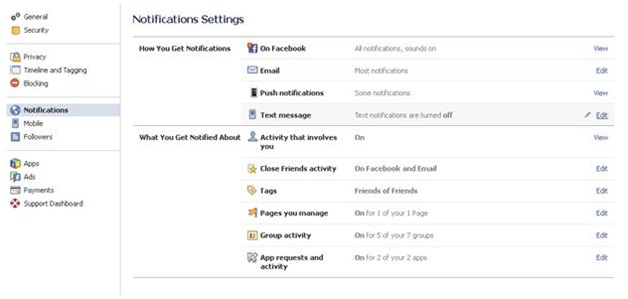
Click on Notifications tab and change following settings as per your requirement.
Step-8:
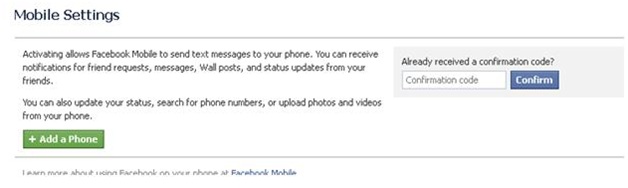
Click on ‘Mobile’ tab and add a mobile no and get a confirmation code and confirm as given.
Step-9:
Click on Followers tab, here default option to turn your followers on is disabled. If you enable this option your followers will able to see your public posts.

Step-10:
Click on ‘Apps’ tab and it is recommended to change configuration settings as mentioned below.
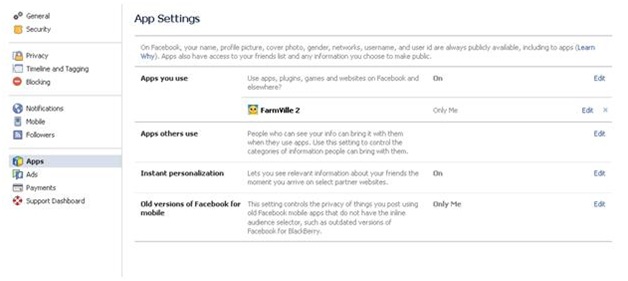
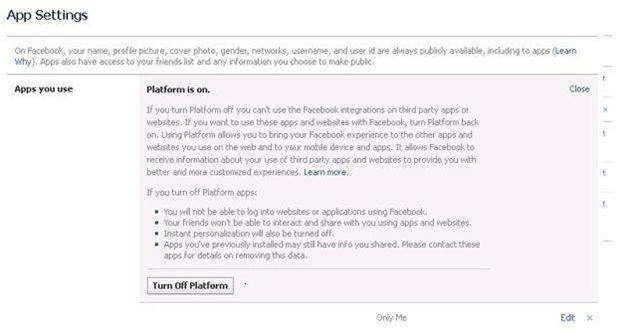
If you don’t use apps at all then disable it by choosing following settings.
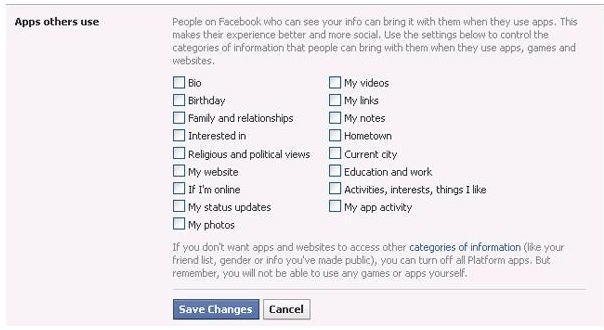
If you want to edit the Apps others use setting to keep your friends use limited accessing your data:
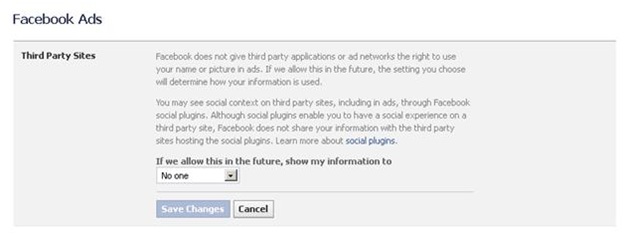
Step-11:
Click on ‘Ads’ tab and edit these settings to ‘No one.’
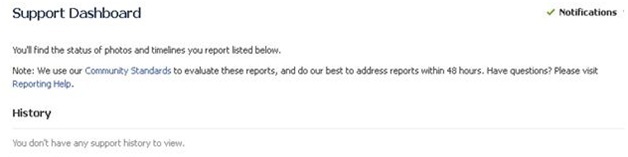
Step-12:
Click on Support Dashboard and it will show you the status of anything you have reported to Facebook.
Hope this will help you to secure you facebook account.
Don’t hesitate to share this post if you like it because it can secure someone else account too.